You don’t have to break the bank to install SSL certificates. Thanks to Let’s Encrypt, you can secure your website for free. As such, in this article, we’re going to show you how to install Let’s Encrypt SSL by using cPanel. Please note: all newly provisioned hosting packages automatically have this installed for you.
What is Let’s Encrypt SSL?
SSL, or Secure Sockets Layer, is a web protocol that protects data transfers so it can’t be accessed by third parties.
An SSL certificate can be obtained from a certificate authority (CA). There are many options out there, but we recommend getting one from Let’s Encrypt— an open-source CA that provides free SSL certificates.
What’s great, most hosting providers offer Let’s Encrypt installation from cPanel, so you don’t have to upload the certificate manually.
While Let’s Encrypt doesn’t cost you anything, it requires you to revalidate the certificate once every 90 days, which might be a problem for some people.
How to Install an SSL Certificate from Let’s Encrypt in cPanel
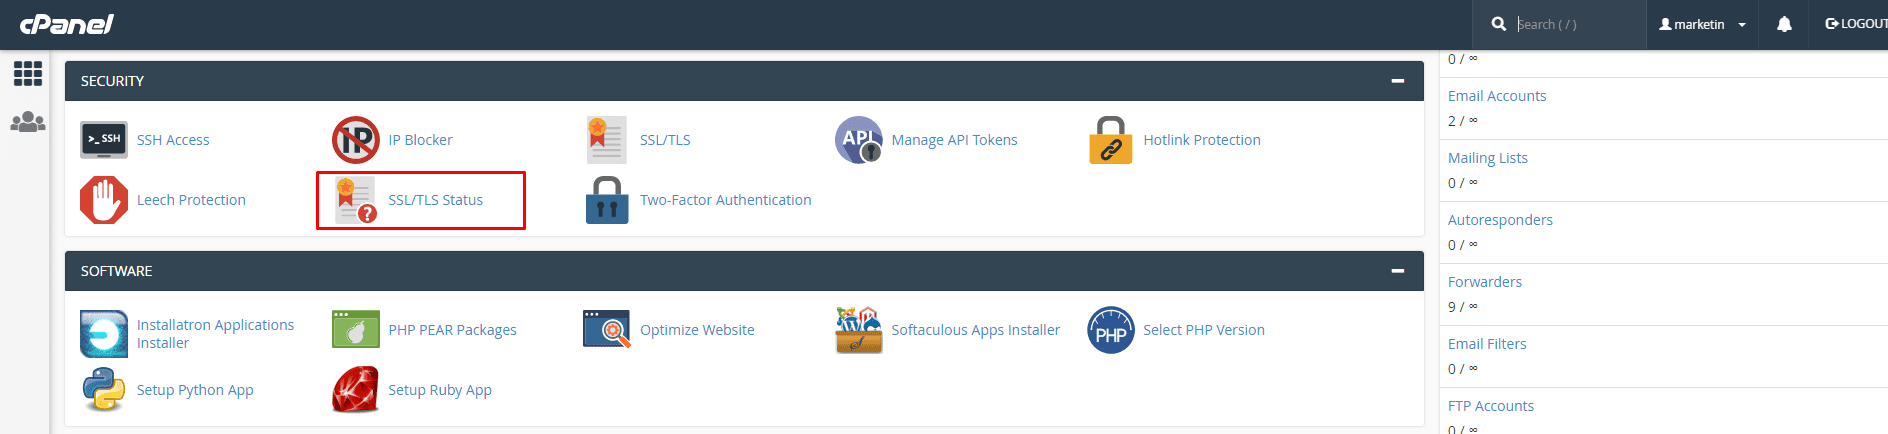
- Open your cPanel by accessing http://yourdomain.com:2083 or http://yourdomain.com/cpanel
- Head over to the Security section and click on the SSL/TLS Status icon.
- Please select Run AutoSSL, and allow 3-5 minutes for the server to generate you a new SSL certificate.
Conclusion
Using SSL protocol is a must for every website owner. It does not only protect you from online attacks but also makes your site more trusted.
To achieve that, you don’t always have to buy an SSL certificate. Take a look at Let’s Encrypt, which offers the same level of protection for free.
In this tutorial, you have learned how to install Let’s Encrypt SSL certificate using cPanel. The only thing you need to do is to open cPanel, go to Let’s Encrypt menu, and issue an SSL certificate on your preferred domain.
It’s easy, right? Now let’s try to do that and enjoy a more secure website!
